
This article is a follow-up to my previous post about How to deploy an application with Dokku.
Something I find nerve-racking about self-hosting is what to do in the case of failure. In that previous post, I mentioned that I had experienced a few failed hard drives, which taught me a lesson continuously enforced over my years in the software industry - to make the server itself not matter. What I mean by that is I should be able to replicate an application at any given moment on any given server.
The two main components of an application are the source code and the data. The source code has already been persisted somewhere, whether in a git repository or a docker image. The data is typically stored in a database and occasionally stored as files in the file system.
In this article, I will share how to back up a Postgres database created using Dokku to an AWS S3 bucket. This will help protect the data in case of a hard drive failure and if the data is corrupted. It's also pretty cheap to save a lot of data in S3 - I have a year's worth of daily backups for my budget app and haven't paid a penny.
Setting Up AWS
This article assumes you have an AWS account setup already. If you don't, it's pretty easy to get started at aws.amazon.com.
Creating an S3 Bucket
We'll start by creating the S3 bucket first to ensure you have the bucket name before creating a user for access.
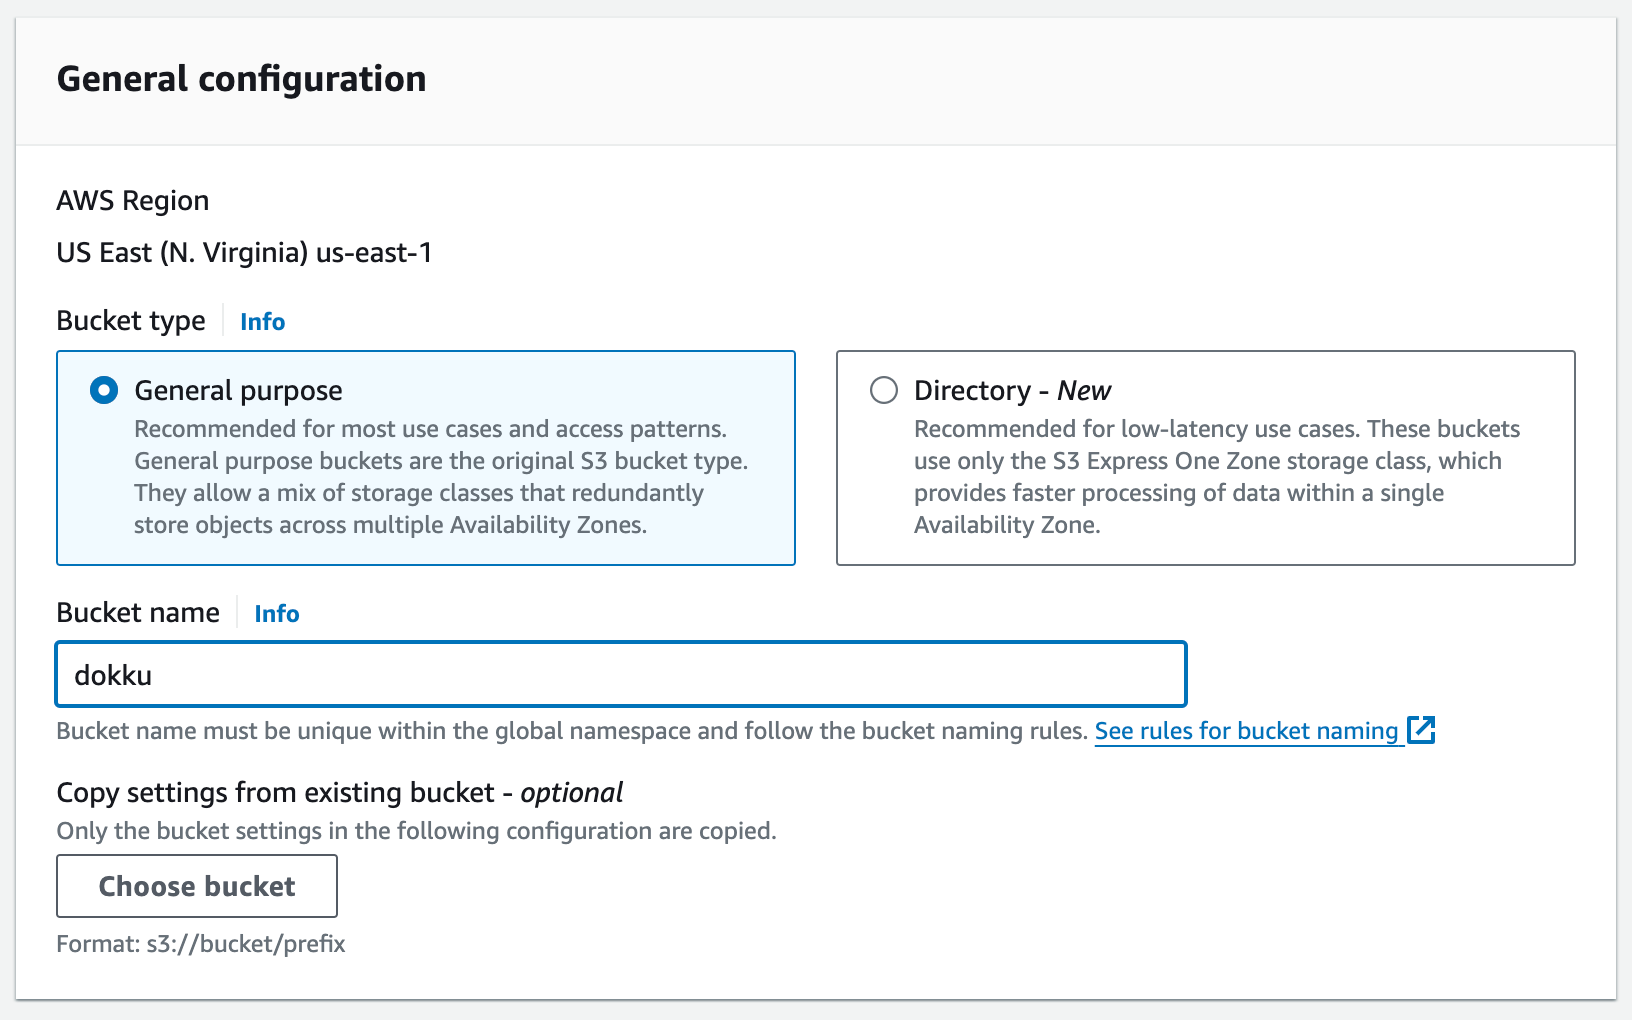
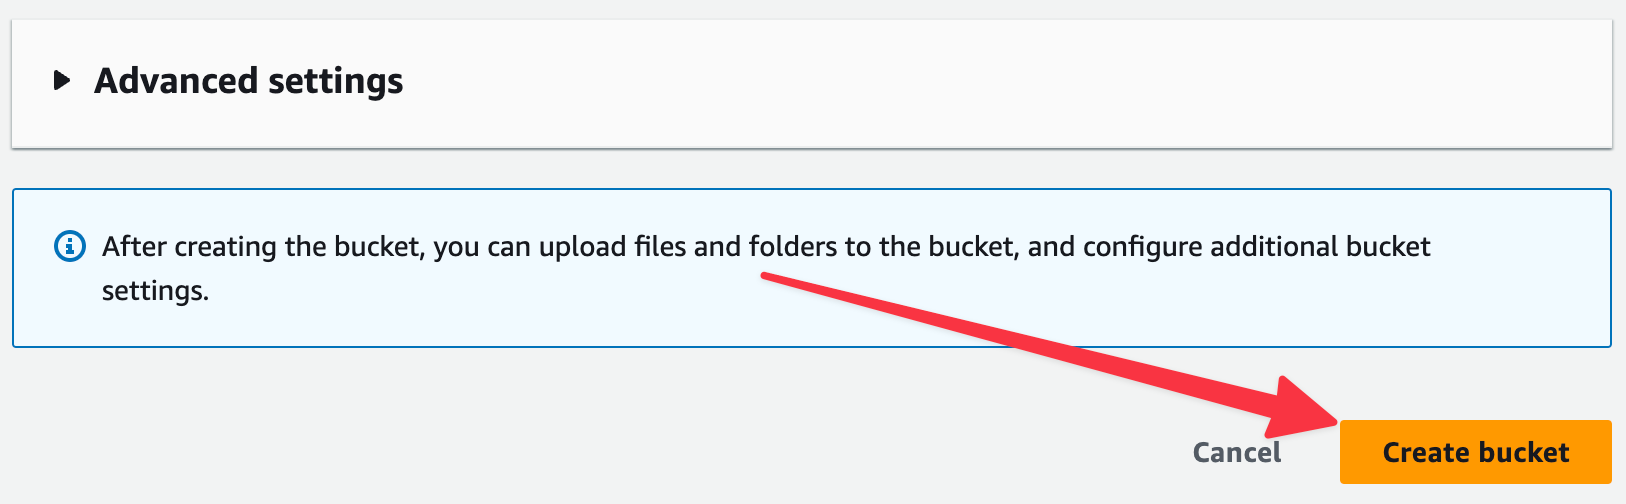
From the S3 main page, click on "Create bucket."
The default settings should work in most cases. The key is choosing a unique bucket name. You can create one bucket to hold all backups or a single one per application. I'll show you how to set the permissions to work in either situation.
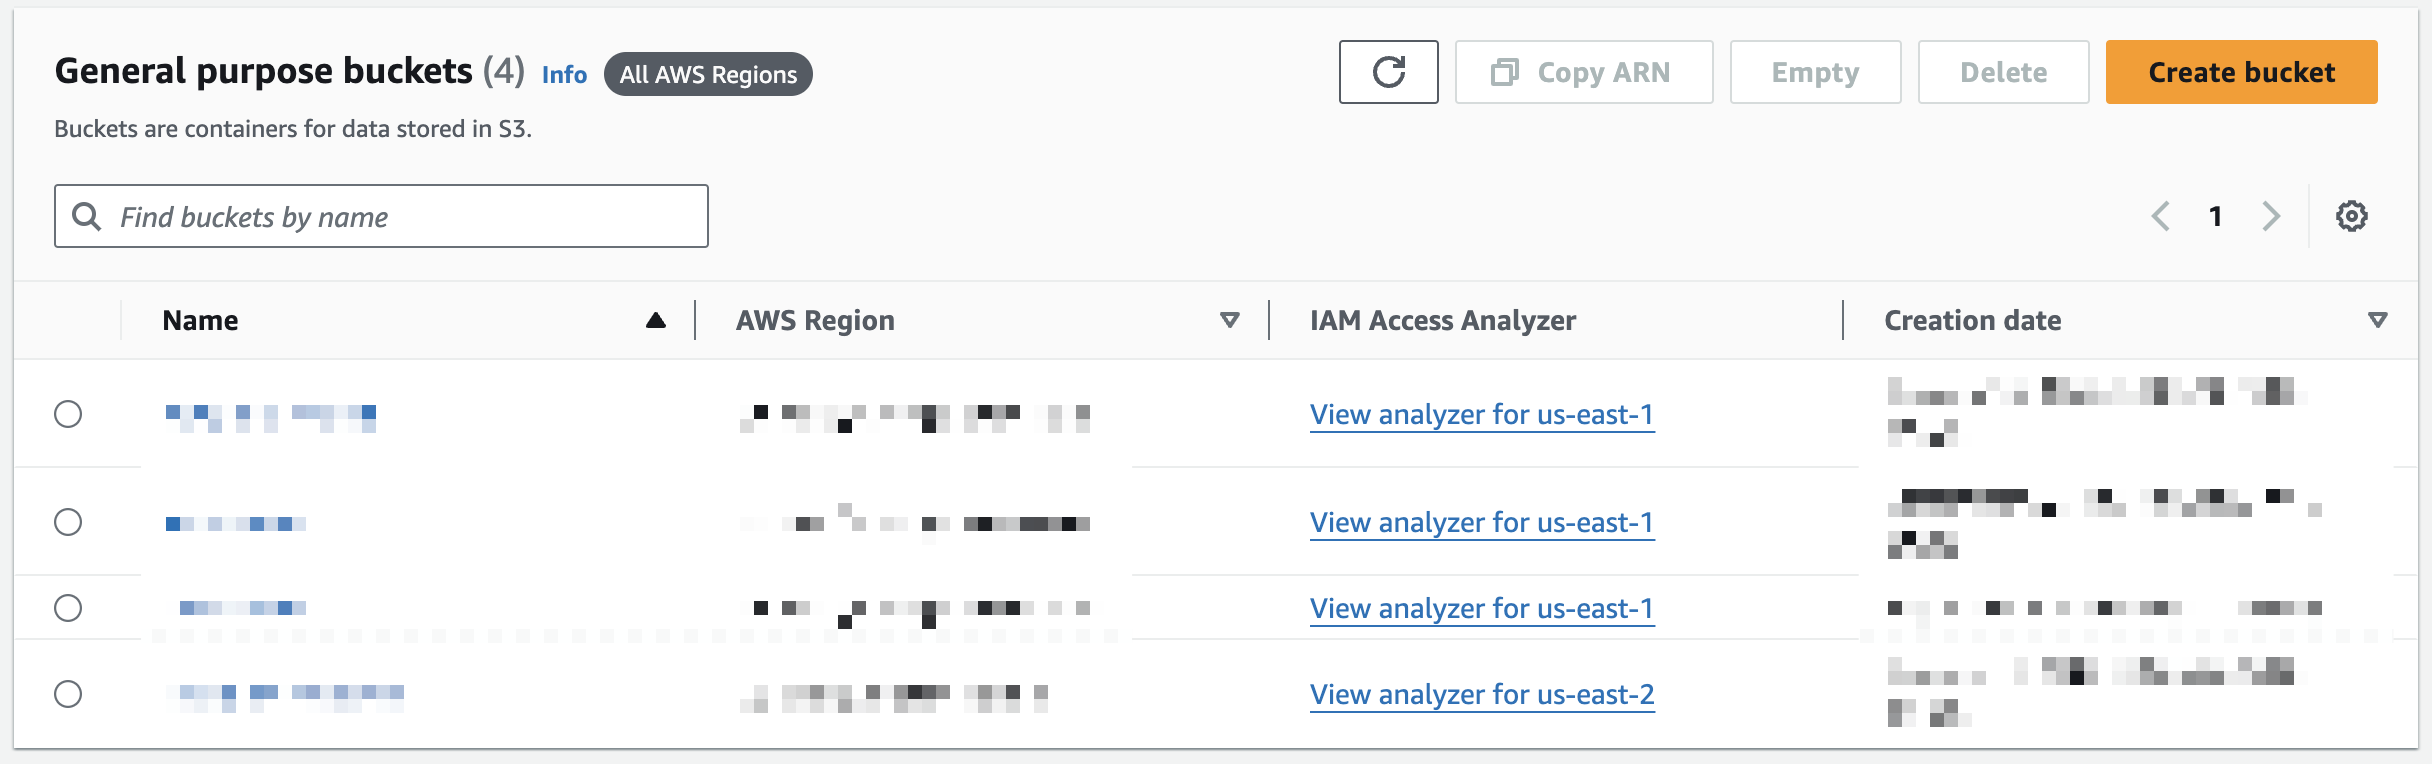
You should now see it listed in your list of buckets:
Creating a User
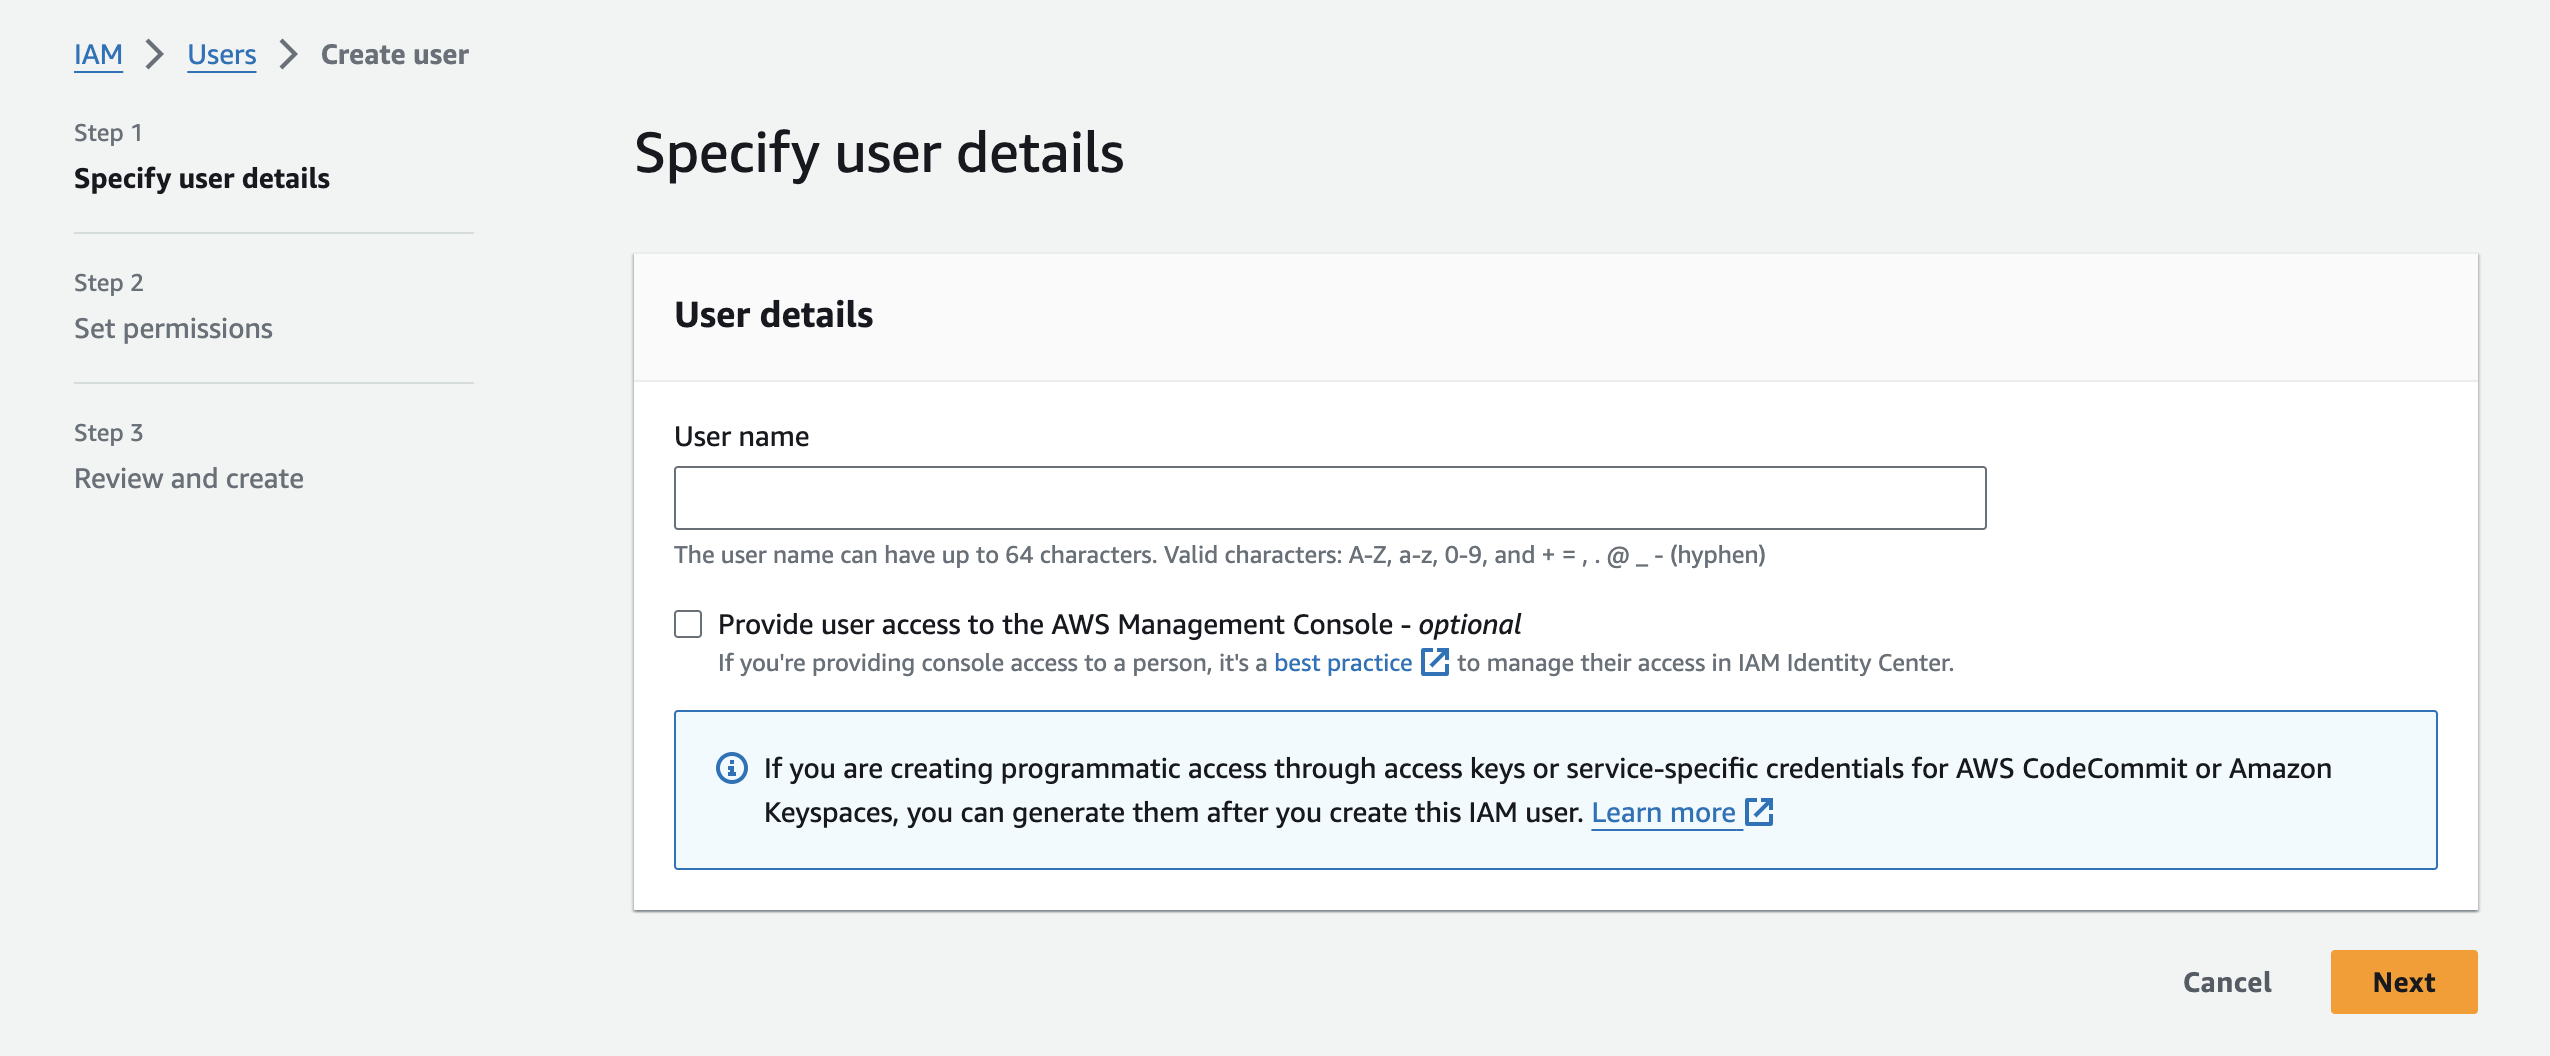
Now, let's create a user that's sole purpose is to provide credentials for a specific bucket (or multiple buckets). Navigate to the IAM page, then to the list of Users. Now, click on the "Create user" button.
You'll land on this page, where you'll select a username. The username doesn't matter, but use something that will help you quickly identify it for reference.
On the next page, select the "Attach policies directly" and then click "Create policy":
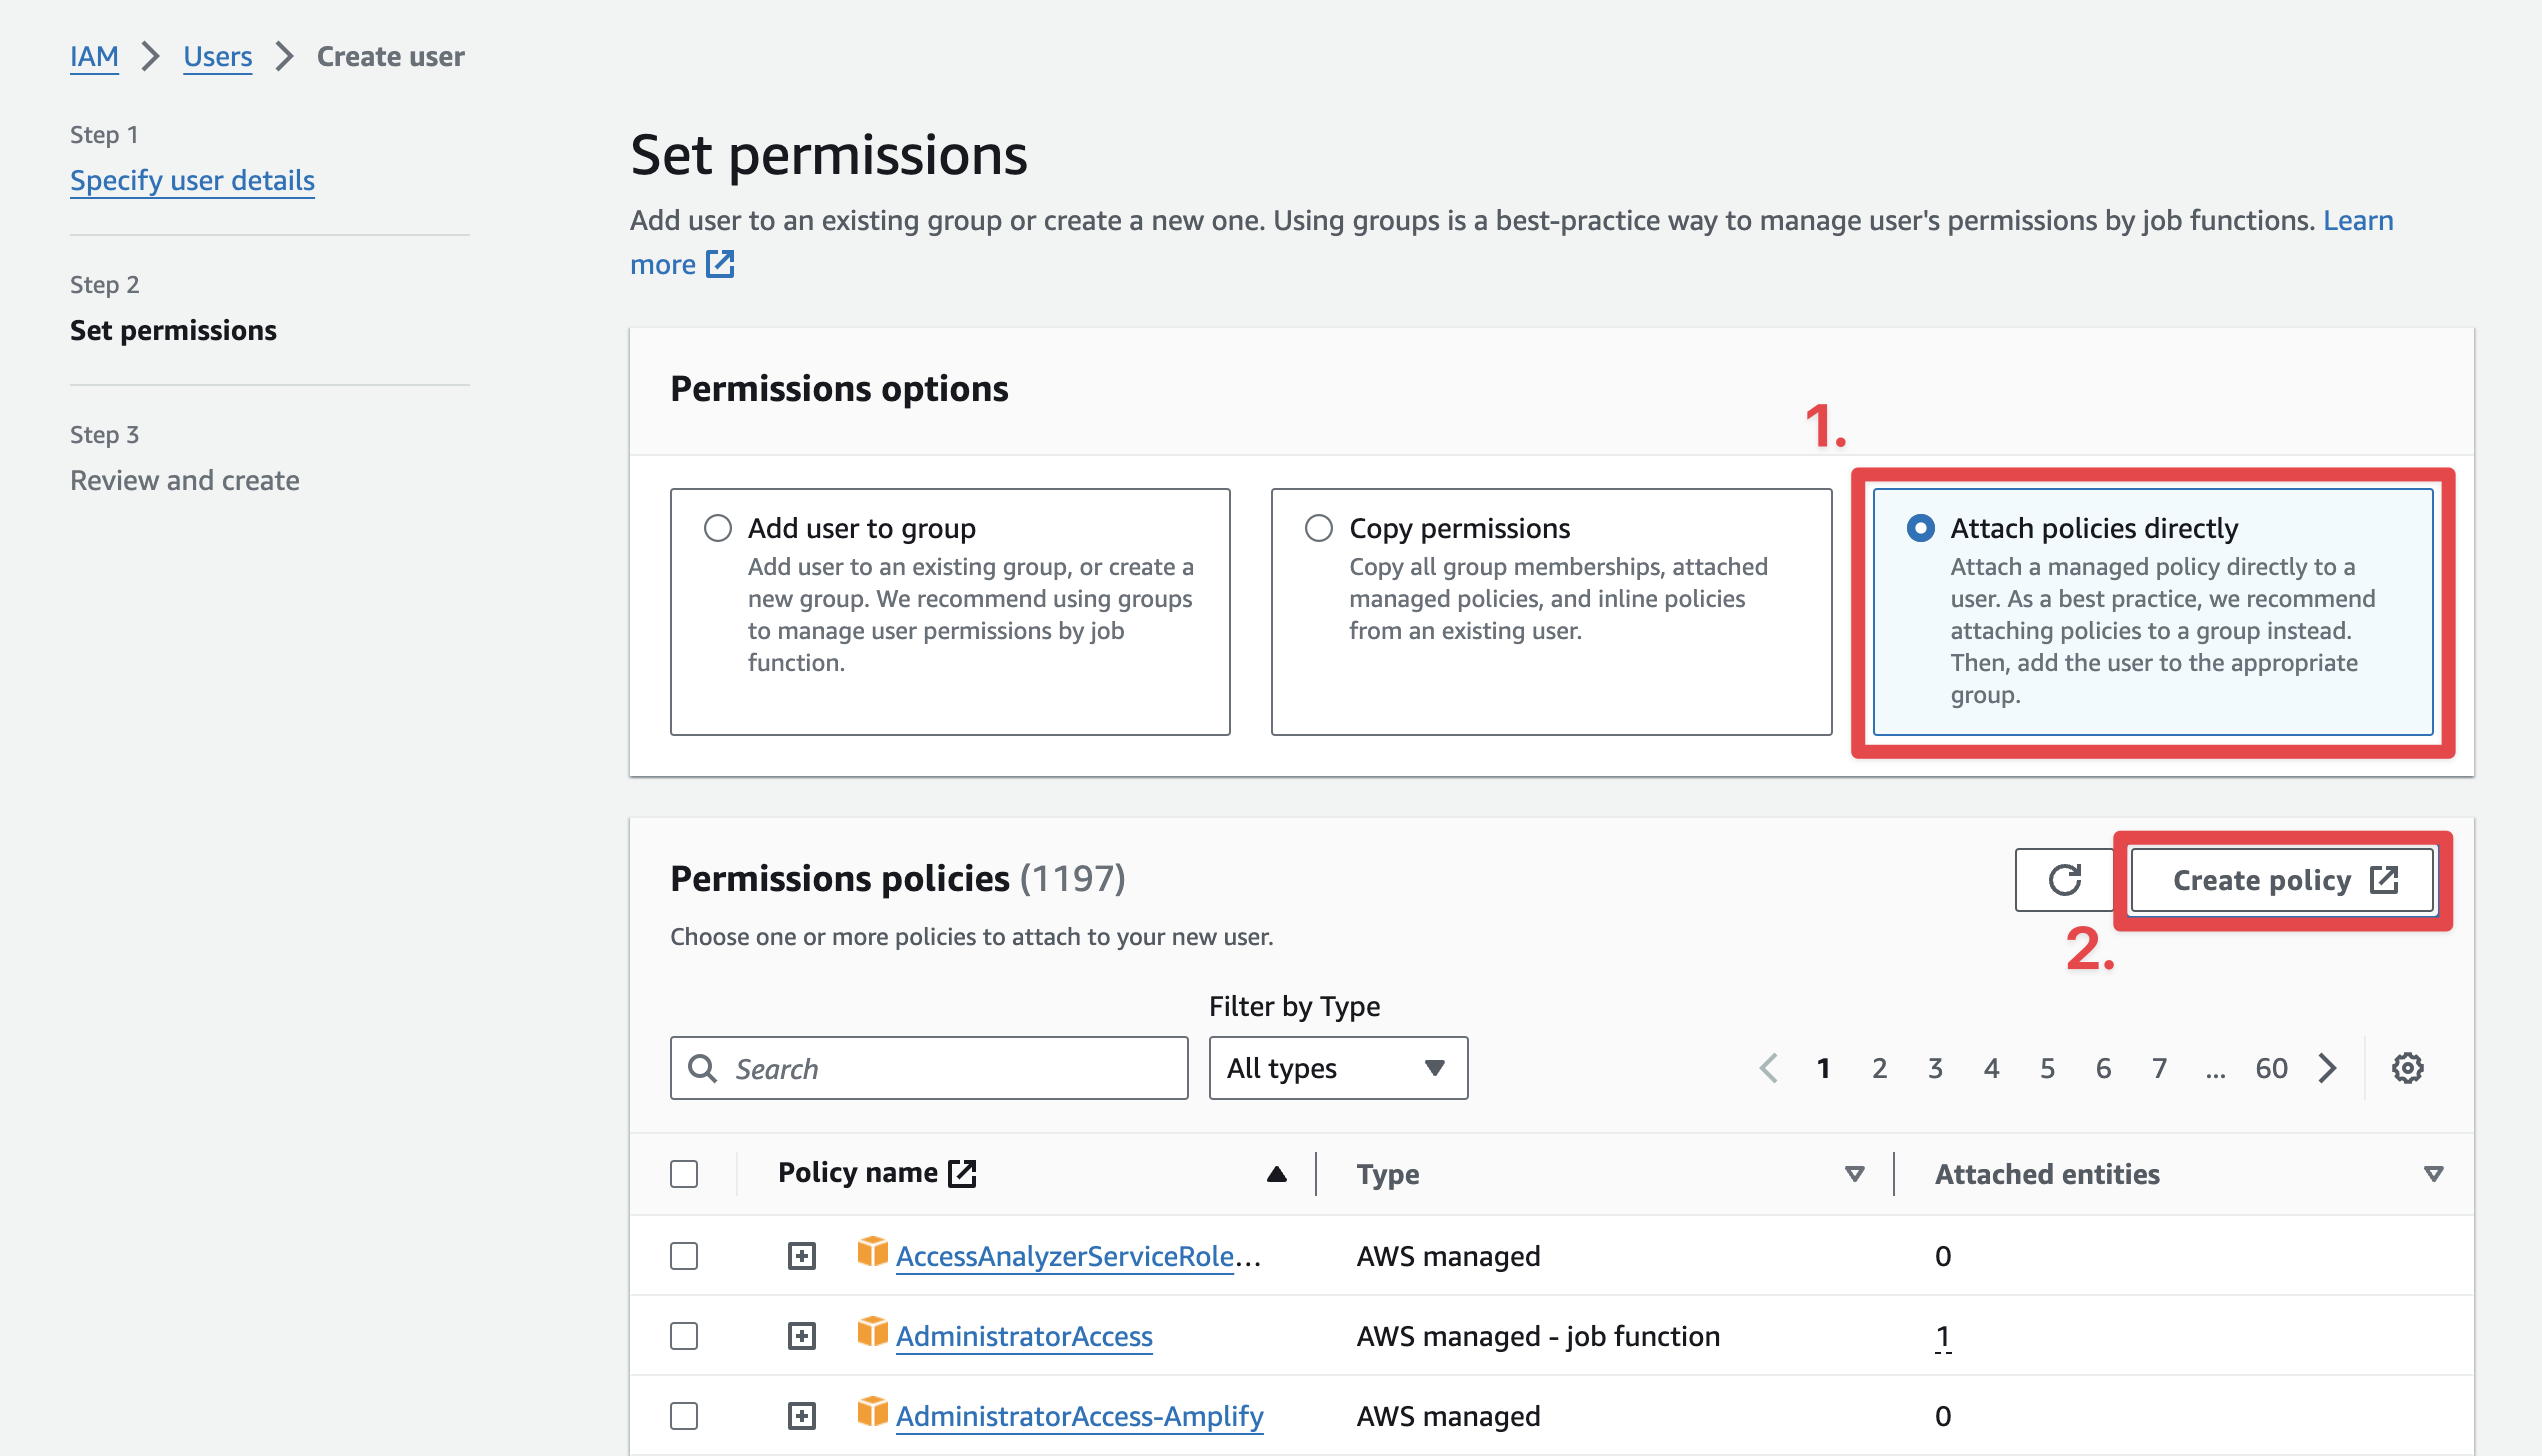
This will open a new tab where you will create a policy specifically for this user to be able to access the bucket we just created and nothing else.
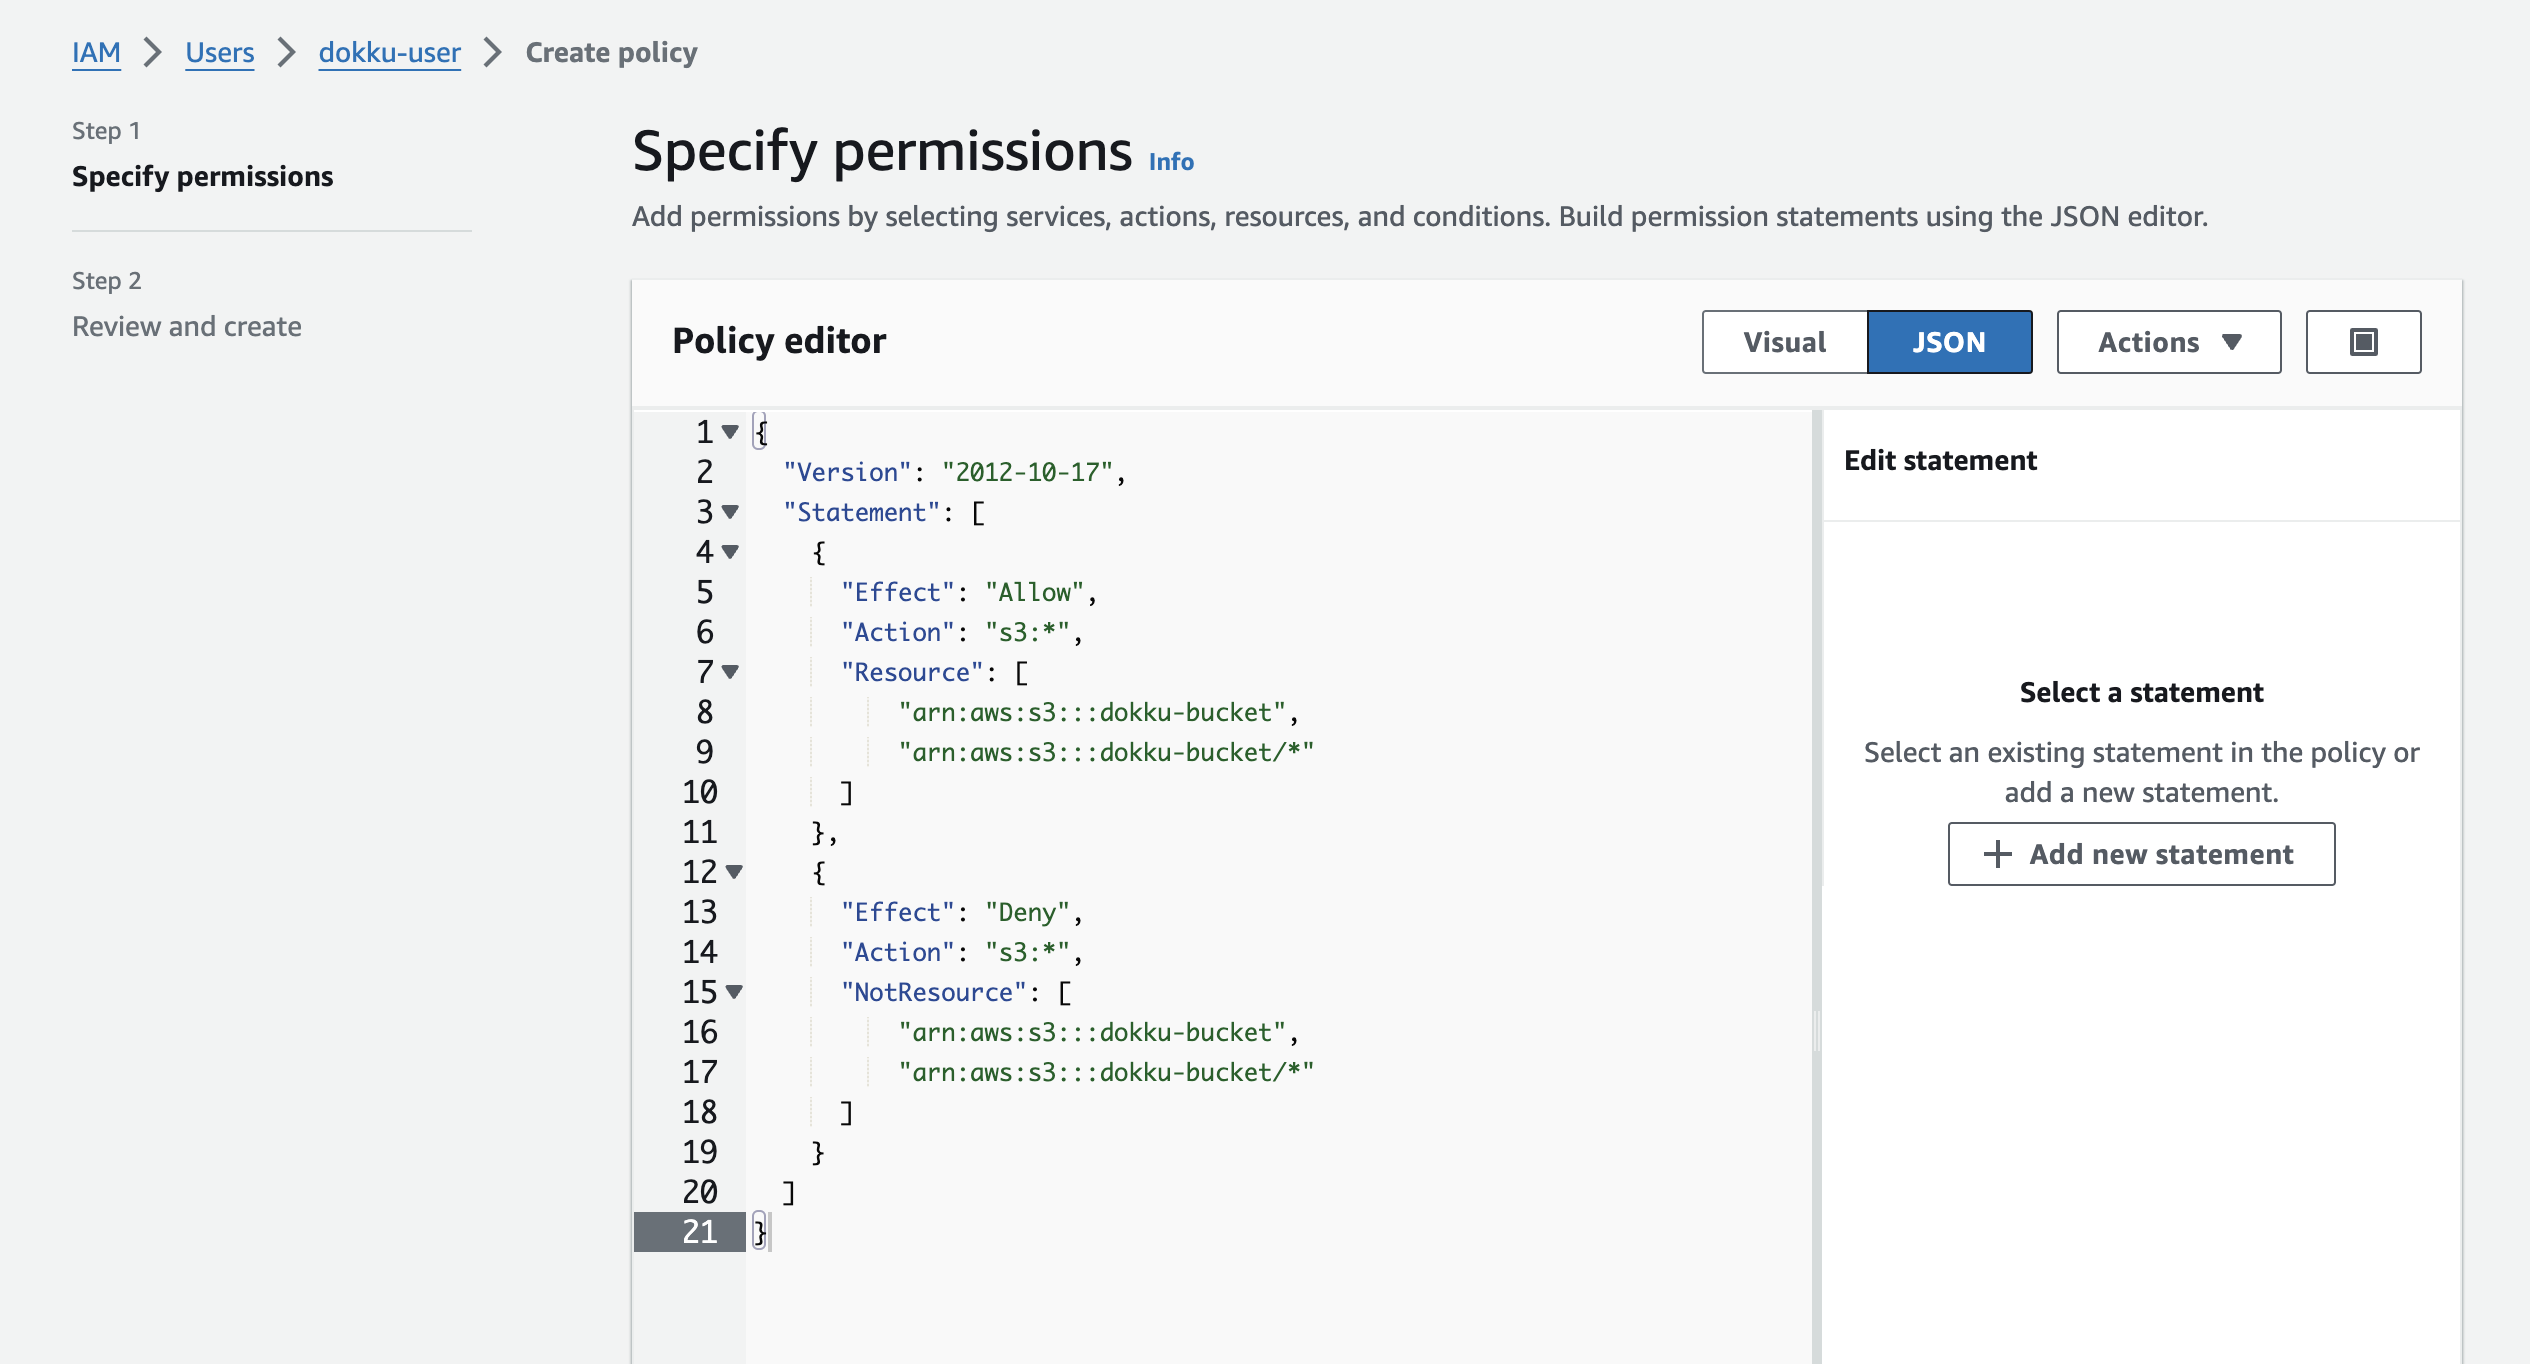
On this screen, select the "JSON" tab and paste the following permissions config, replacing the "dokku-bucket" section with the name of the bucket you created in the previous step:
{
  "Version": "2012-10-17",
  "Statement": [
    {
      "Effect": "Allow",
      "Action": "s3:*",
      "Resource": [
          "arn:aws:s3:::dokku-bucket",
          "arn:aws:s3:::dokku-bucket/*"
      ]
    },
    {
      "Effect": "Deny",
      "Action": "s3:*",
      "NotResource": [
          "arn:aws:s3:::dokku-bucket",
          "arn:aws:s3:::dokku-bucket/*"
      ]
    }
  ]
}
This will allow any S3 action (read/write access) to the specified bucket and no others. Make sure to update the bucket name to match the one you created in the first step.
To add permissions to multiple buckets, add more lines like the following to both the "Resource" and "NotResource" sections:
[
    "arn:aws:s3:::dokku-bucket",
    "arn:aws:s3:::dokku-bucket/*",
    "arn:aws:s3:::other-dokku-bucket",
    "arn:aws:s3:::other-dokku-bucket/*"
]
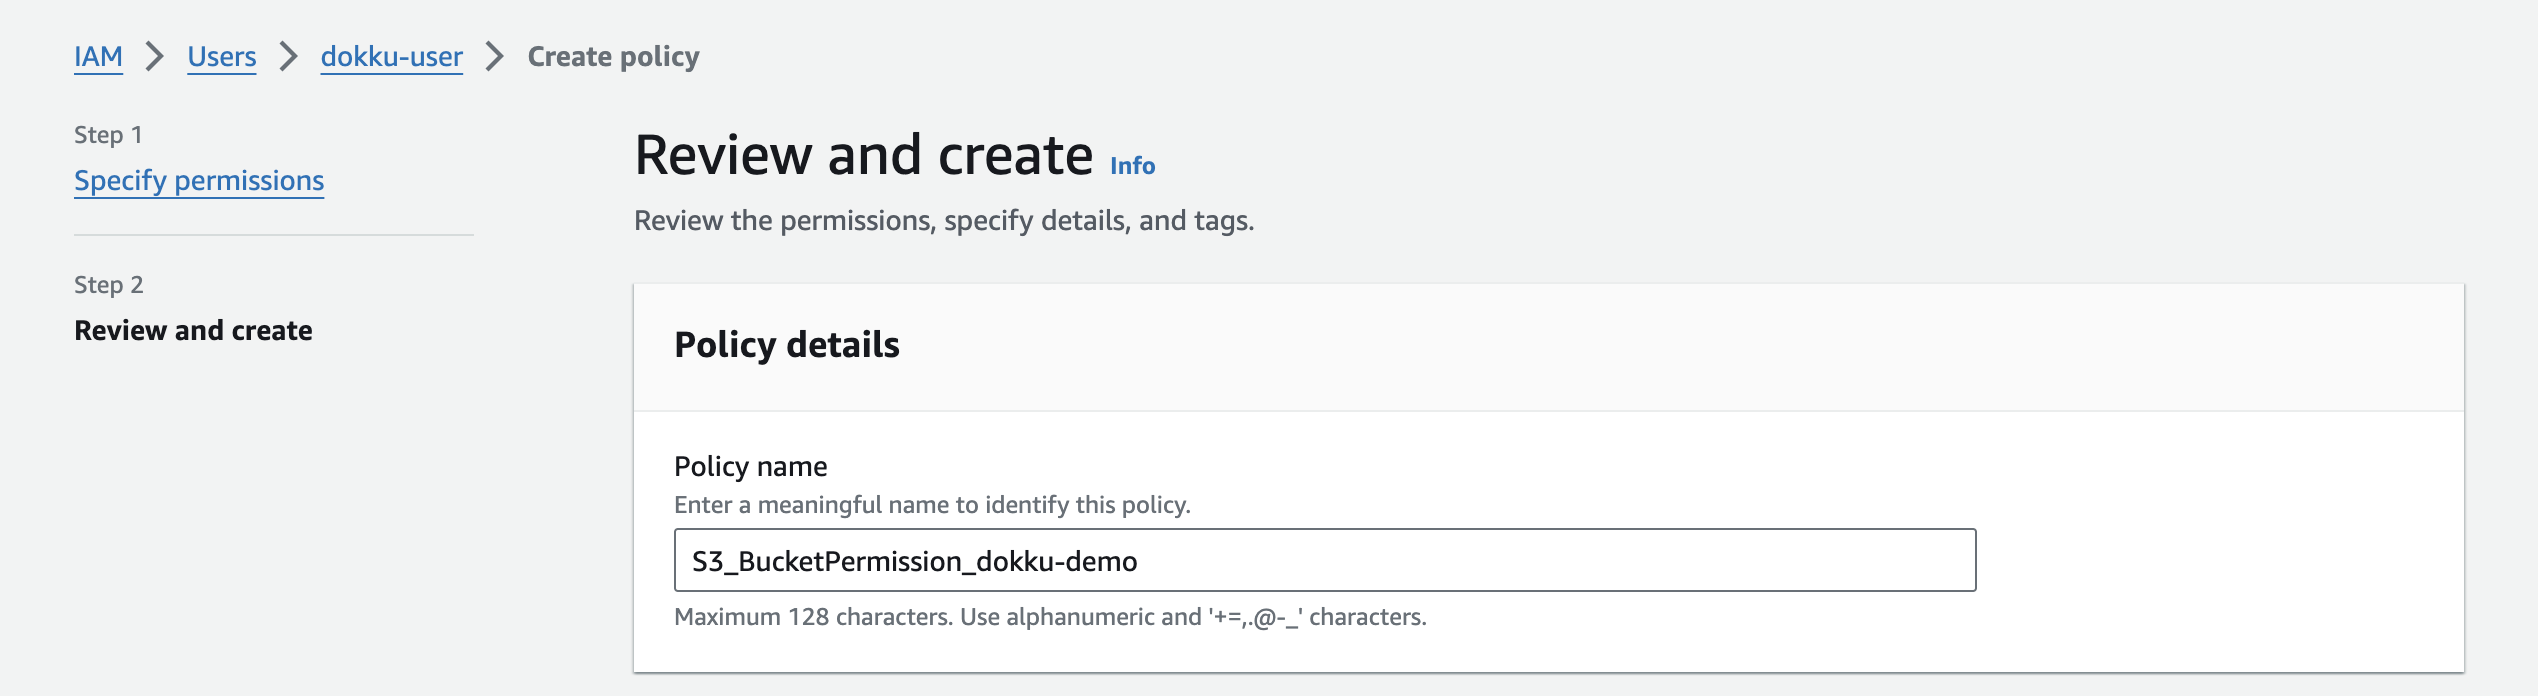
In the next step, you'll have to name the policy:
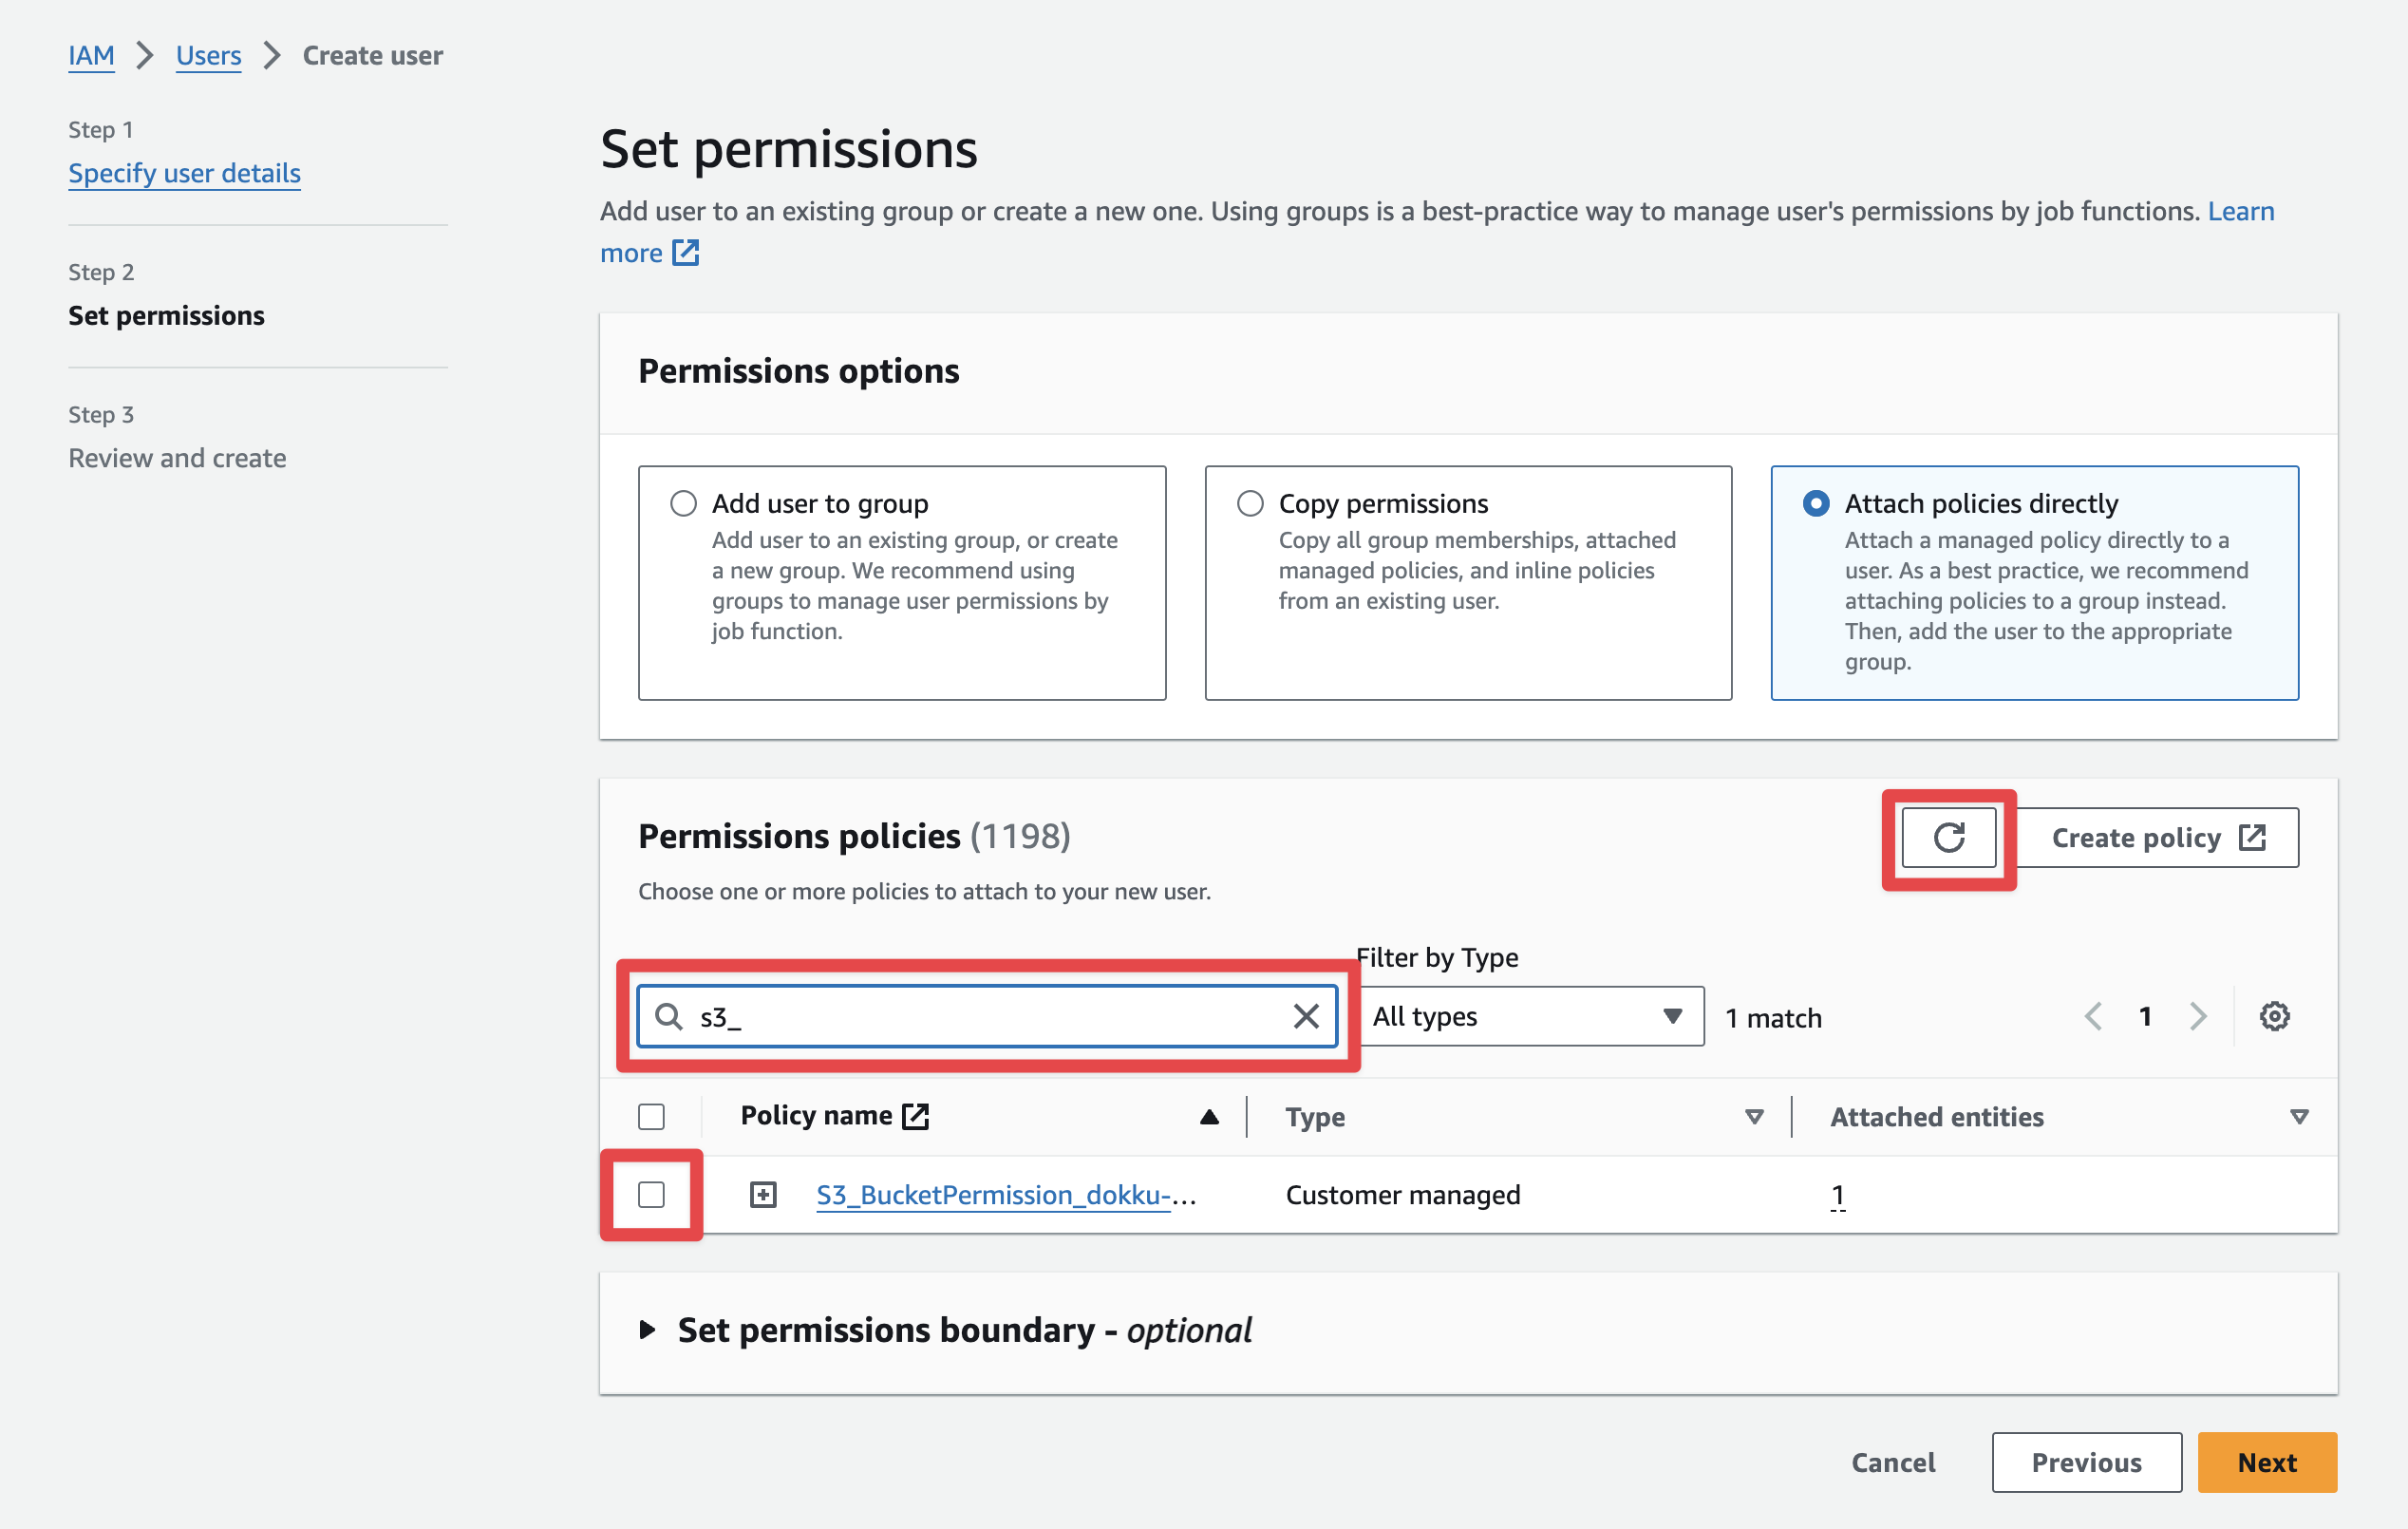
After you create the policy, you'll want to come back to the tab where we were in the middle of creating the user to attach the newly created permissions policy. When you come back to the tab, you'll have to refresh the list of policies and then search for the policy you just created:
On the next page, you'll confirm and create the user.
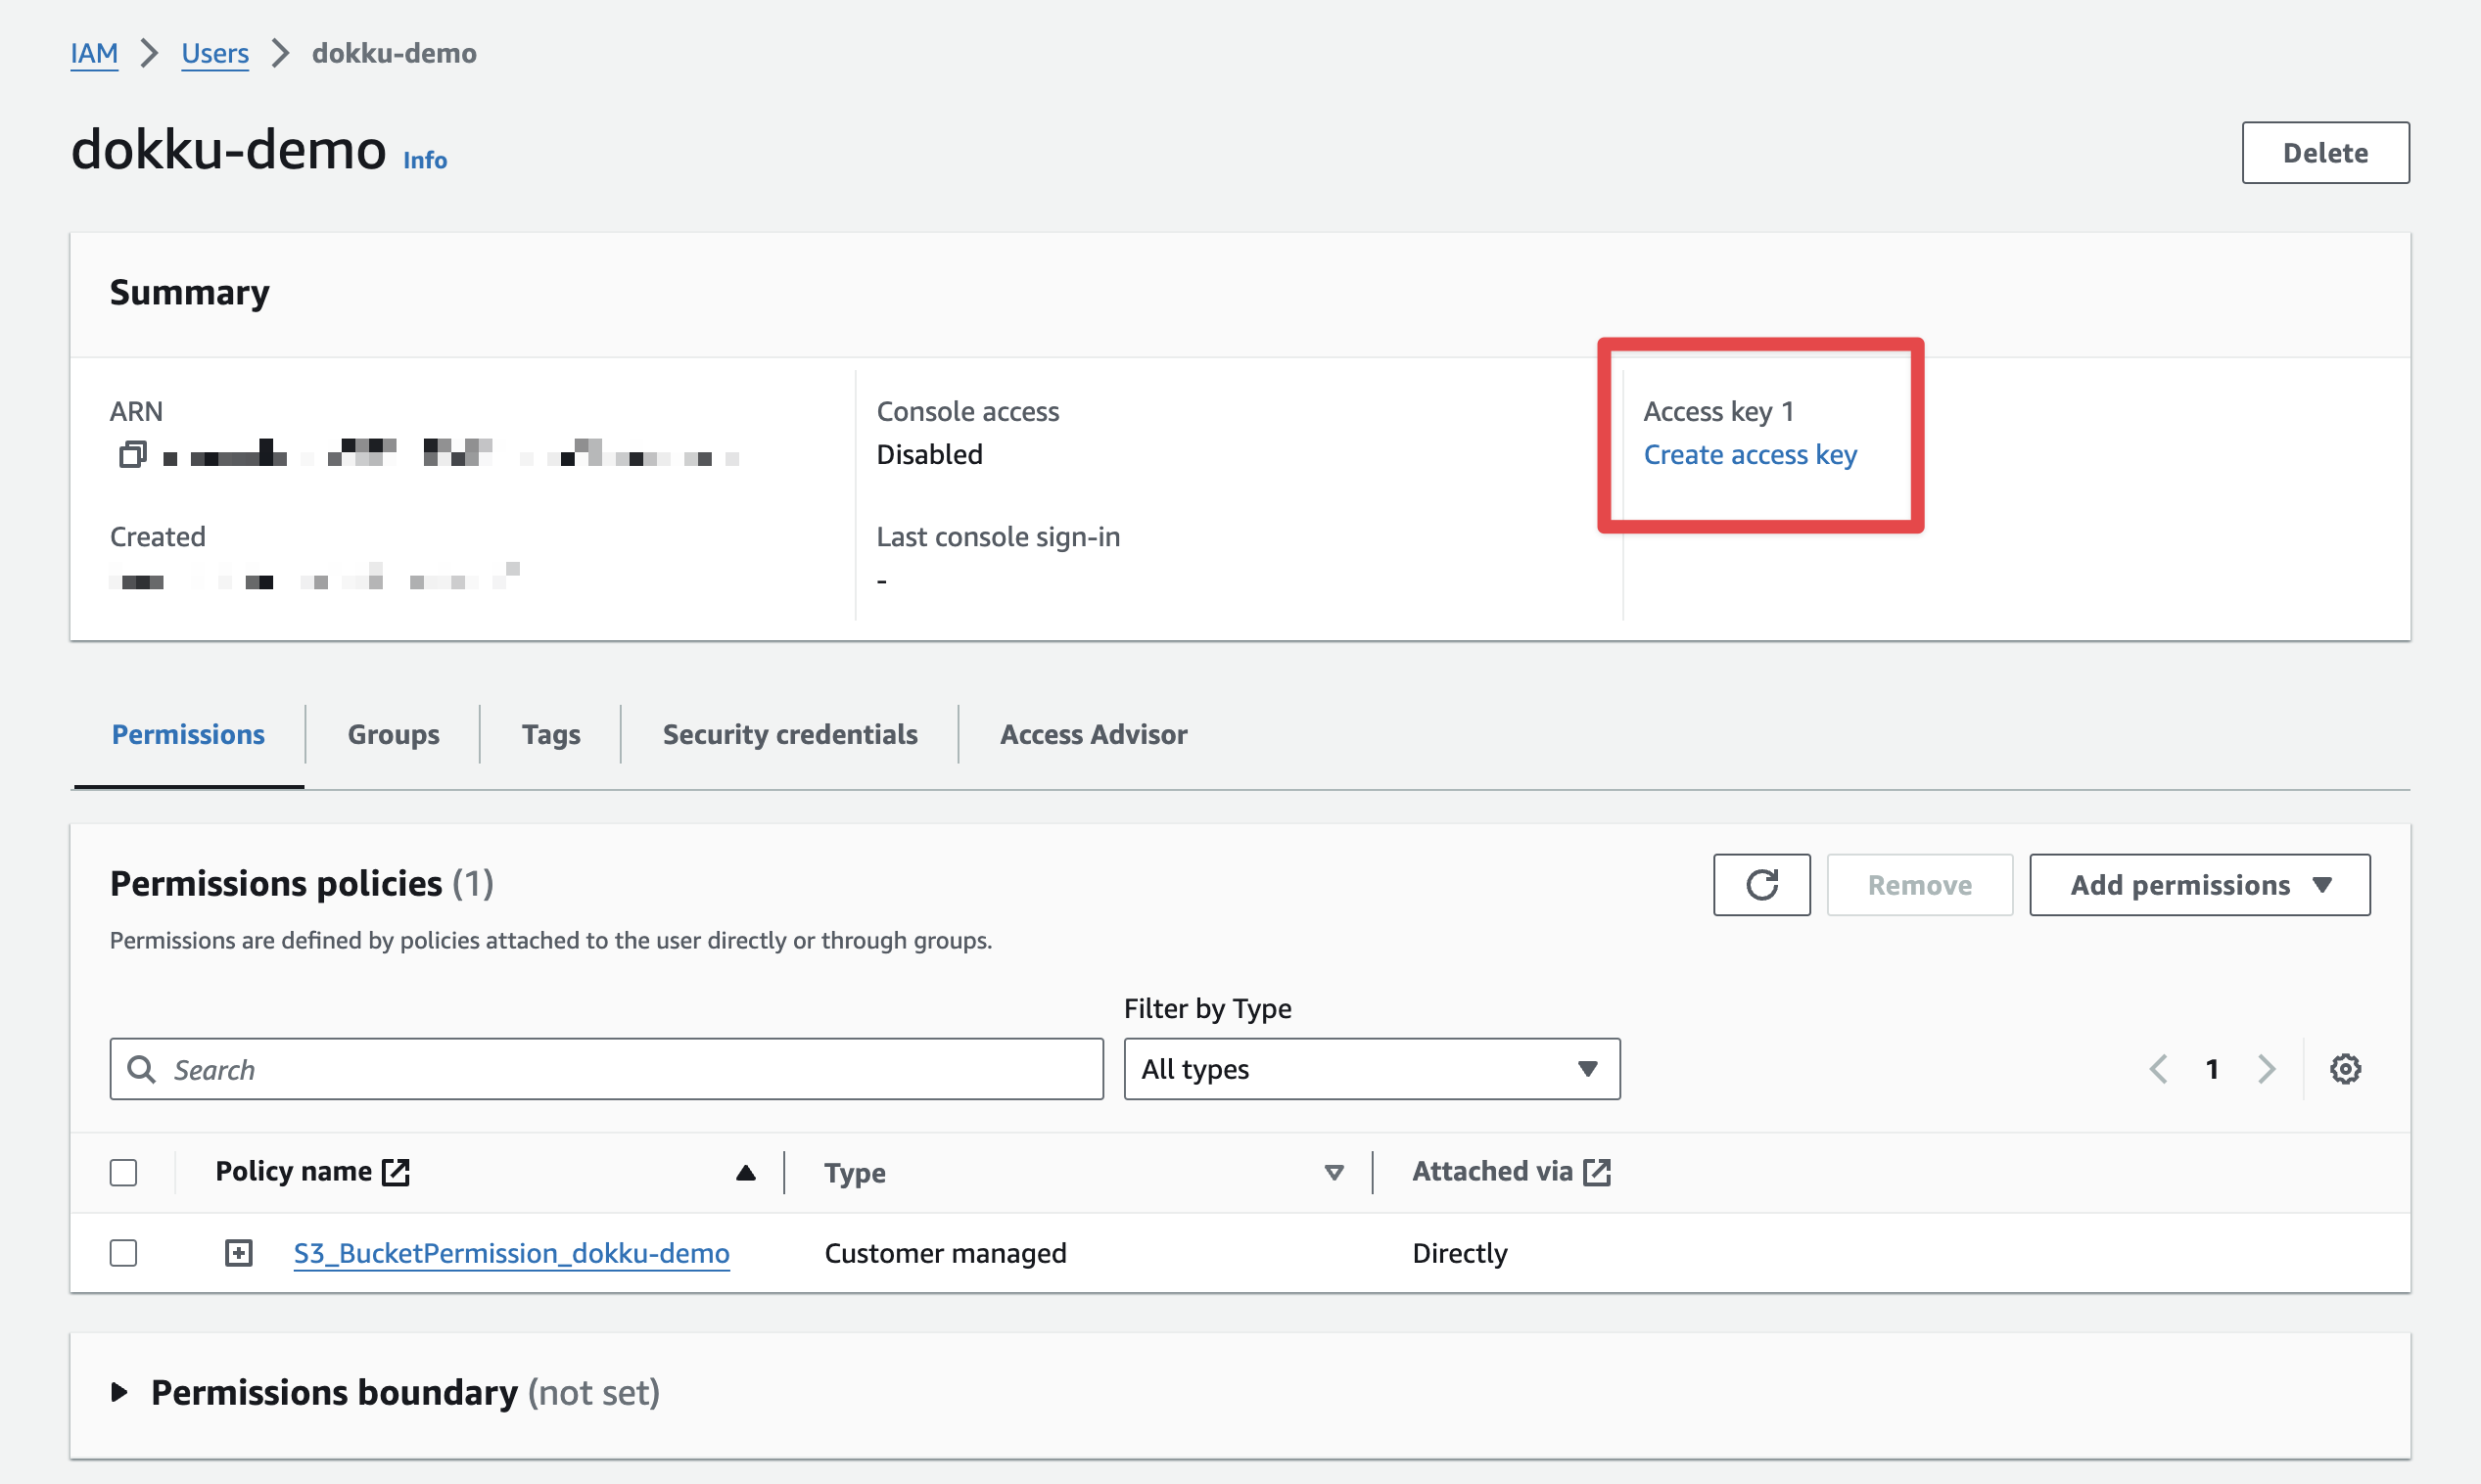
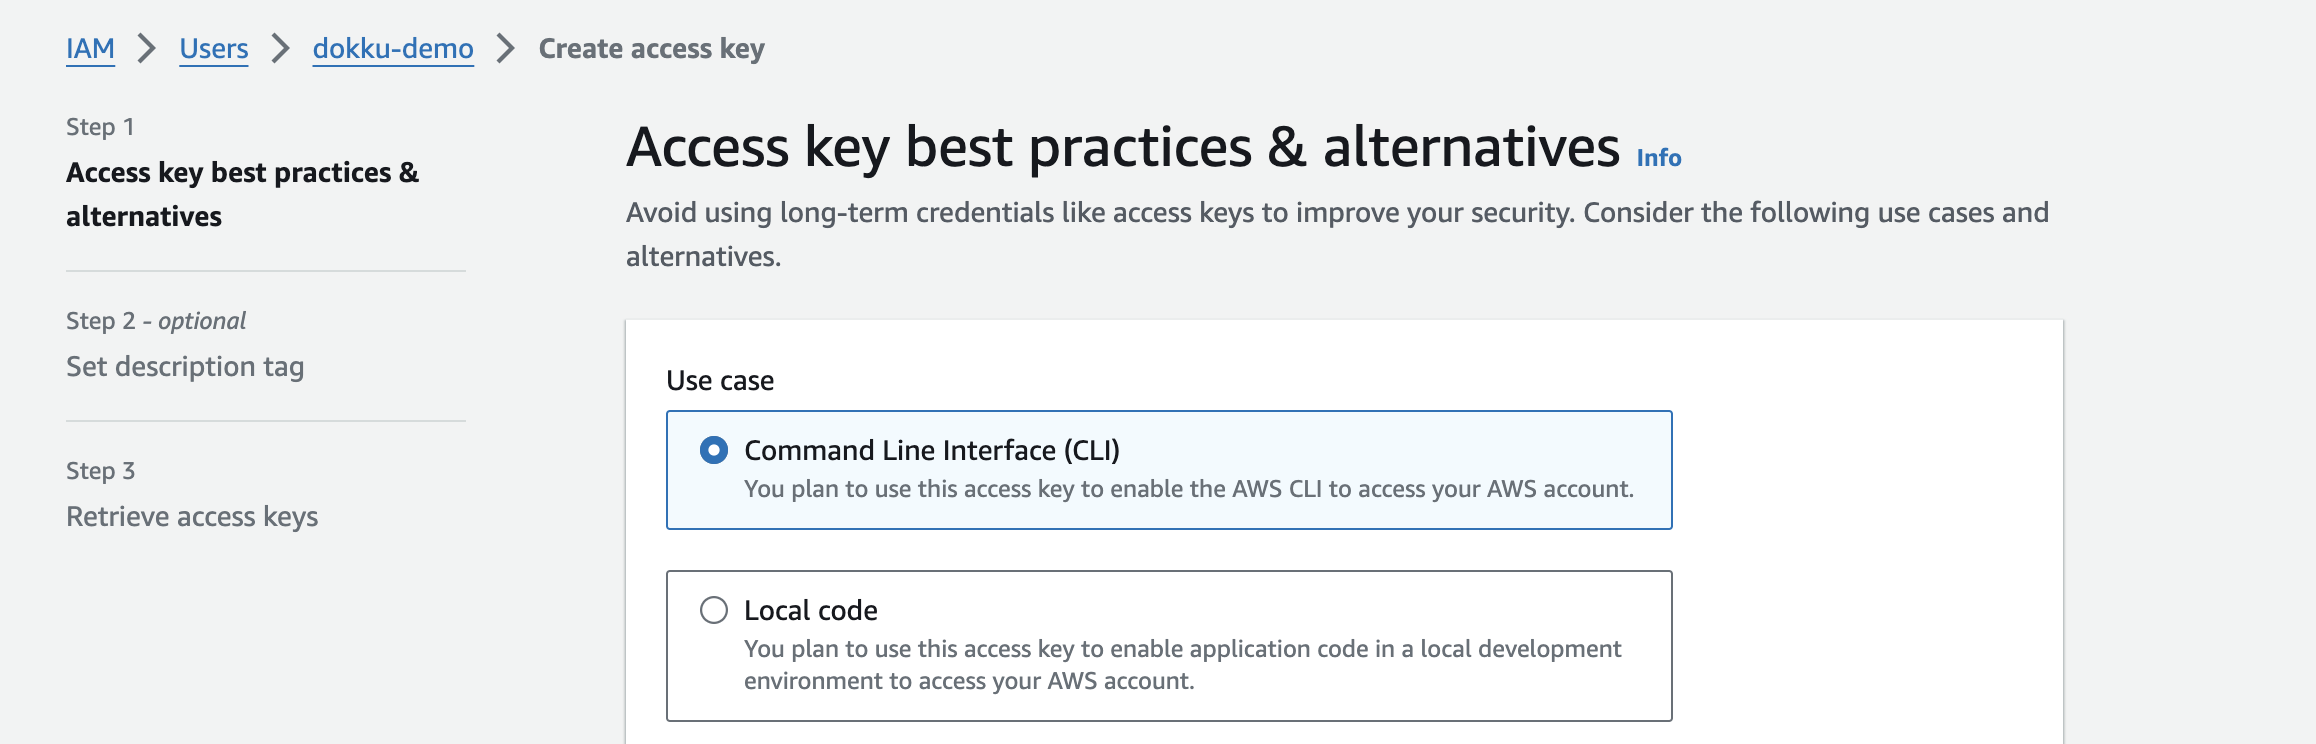
Generating the Access Keys
The last step in AWS is to create an access key to log in as this user programmatically:
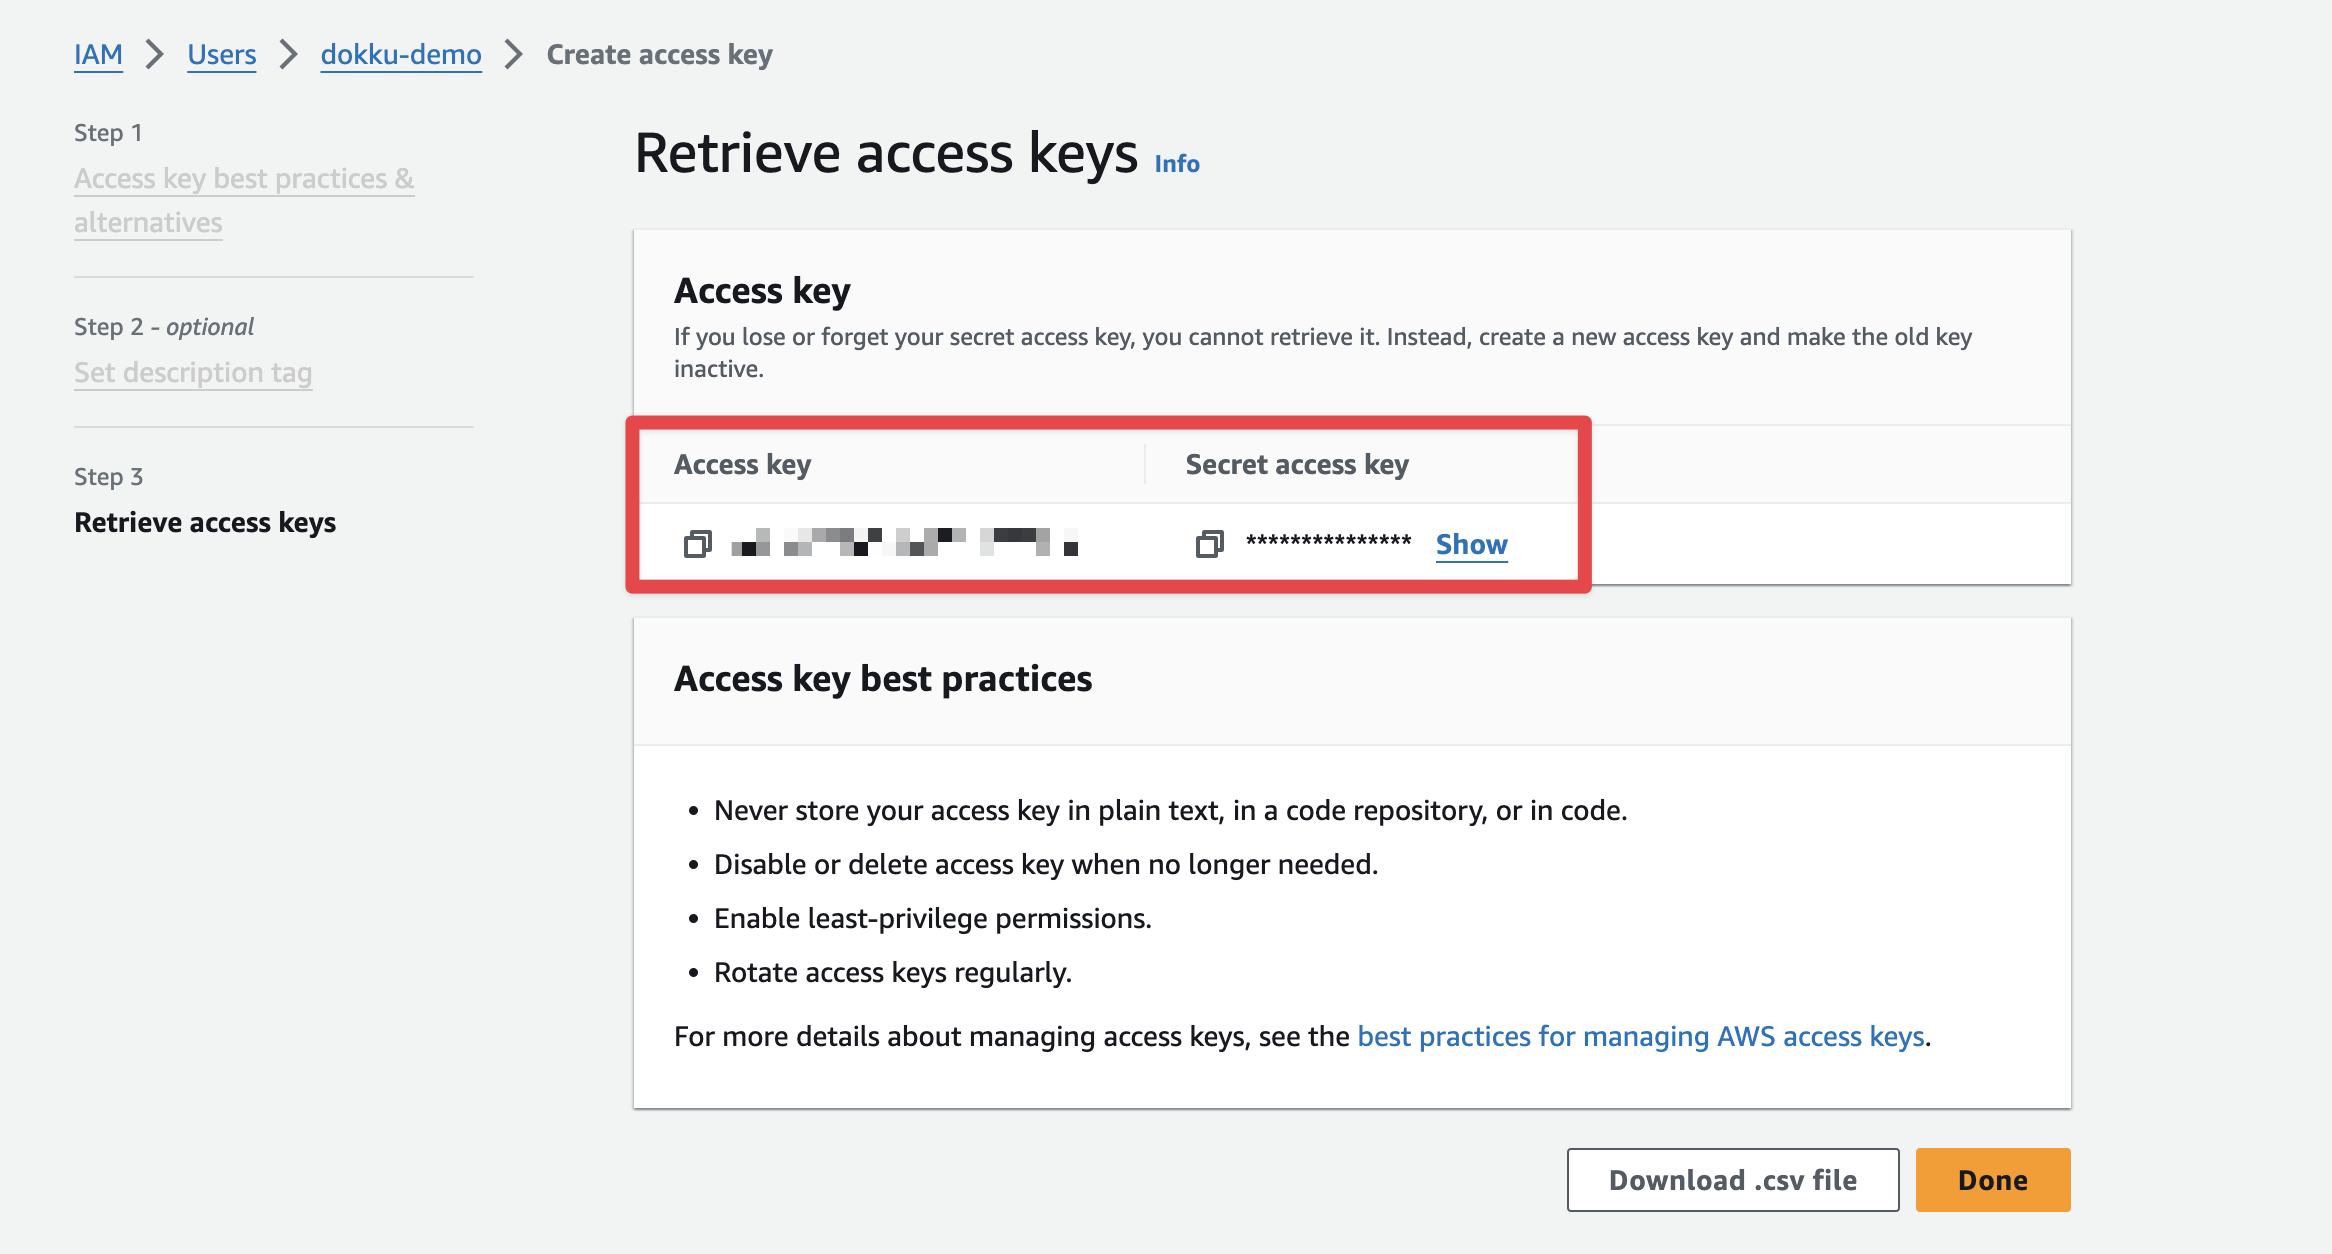
Save these values; we'll use them in the next step below.
Back in the Command Line
Now that the AWS bucket and user are set up, we can use these settings to back up our Dokku database(s) to S3.
Note: this example uses the Dokku Postgres plugin, but similar functionality is also provided for MySQL and Mongo plugins.
First, we need to authorize the database with the AWS User we created:
dokku postgres:backup-auth linkwarden-db <AWS_ACCESS_KEY> <AWS_SECRET_KEY>Now, we should test this by making our first backup:
dokku postgres:backup linkwarden-db dokku-bucket/linkwarden/database-backupsYou can use any sub-bucket name that you want within the dokku-bucket. I like to scope my database backups within a bucket named after the application just in case I want to group additional buckets to contain other data.
Lastly, we will set up a schedule to get periodic snapshots.
As far as how often you want to backup, I think the default that makes sense for most applications would be one week:
dokku postgres:backup-schedule linkwarden-db "0 0 0 * *" dokku-bucket/linkwarden/database-backupsBut for applications that I actively develop or ones that have a lot of essential data (like my personal budgeting app), I actually set to daily:
dokku postgres:backup-schedule linkwarden-db "0 0 * * *" dokku-bucket/linkwarden/database-backupsYou can verify this was appropriately set with the following command:
dokku postgres:backup-schedule-cat linkwarden-dbAnd that's it! You should now have periodic backups set up to avoid losing any data.
Encryption (Optional)
If you are backing up sensitive data or want an added level of security that your data is protected, then the Dokku Postgres plugin provides an easy way to do that:
ENCRYPTION_KEY=`openssl rand -hex 32`; \
echo "ENCRYPTION_KEY: $ENCRYPTION_KEY"; \
dokku postgres:backup-set-encryption insightful-money-db $ENCRYPTION_KEY
This will generate a random string to set as the encryption key and log it so you can save it for future use when you need to pull the backup down.
Make sure you save this encryption key. If you lose it, the backups will be rendered useless.
How To Recover
Not many seem to think about this when they are setting up backups - how would you recover the data from a backup?
Luckily, there are just a few steps to follow.
Before continuing, make sure you have aws installed.
Now, log in with the credentials you generated above, figure out which backup files are available, and then copy the latest backup file over to the current machine:
aws configure --profile dokku-demo
aws s3 ls s3://dokku-bucket/linkwarden-db/database-backups
aws s3 --profile dokku-demo cp s3://dokku-bucket/linkwarden-db/database-backups/<BACKUP_FILE_NAME>.tgz .
Now, unpack it and import it to the restored database:
tar -xvzf <BACKUP_FILE_NAME>.tgz
dokku postgres:import linkwarden-db-restored < backup/export
If you set up encryption, use this command to decrypt and decompress at once:
gpg -d <BACKUP_FILE_NAME>.tgz.gpg | tar xzvf -
dokku postgres:import linkwarden-db-restore < backup/export
I'd suggest that any time you set up backups, you test restoration to have the most confidence.
Backing Up Files
Something I haven't really touched on is how to backup files, like with Linkwarden, which we have mounted to /opt/linkwarden/data. To be honest, I haven't really worked on attempting to back this data up yet, but I have looked around and thought I might try rclone, which is a CLI utility that can use rsync to sync files to an S3 bucket just like the one we just created. I'll create another post if I figure out how to get that working.
I hope this article helps you feel more secure about your data being backed up so that if your machine ever fails or your database gets corrupted, you can fix it.
Let me know if you have any questions.
Find me on Threads or email me at [email protected]